top of page
Candy Shop FX Blog
Proposal: I will be working with a small team to create a project where a small candy shop is brought to life through the power of music. Houdini will be used to create fountains of candy emitting from their boxes set along walls. I will also be assisting in modeling and texturing when needed.
Responsibilities: RBD simulations and modeling
*Animatic by Morgan Woodward and Emily Lacombe*
Procedure
- Create bins of candy in resting positions by simulating rows of candy falling into a container
- Cache out the starting positions
- Use wind forces to push candy upwards from underneath to create a fountain
- Work with team to adjust timing, amplitudes etc.
Reference
Notes:
- NOT AN EXPLOSION
- Geyser references
- Las Vegas fountains
Week 1:
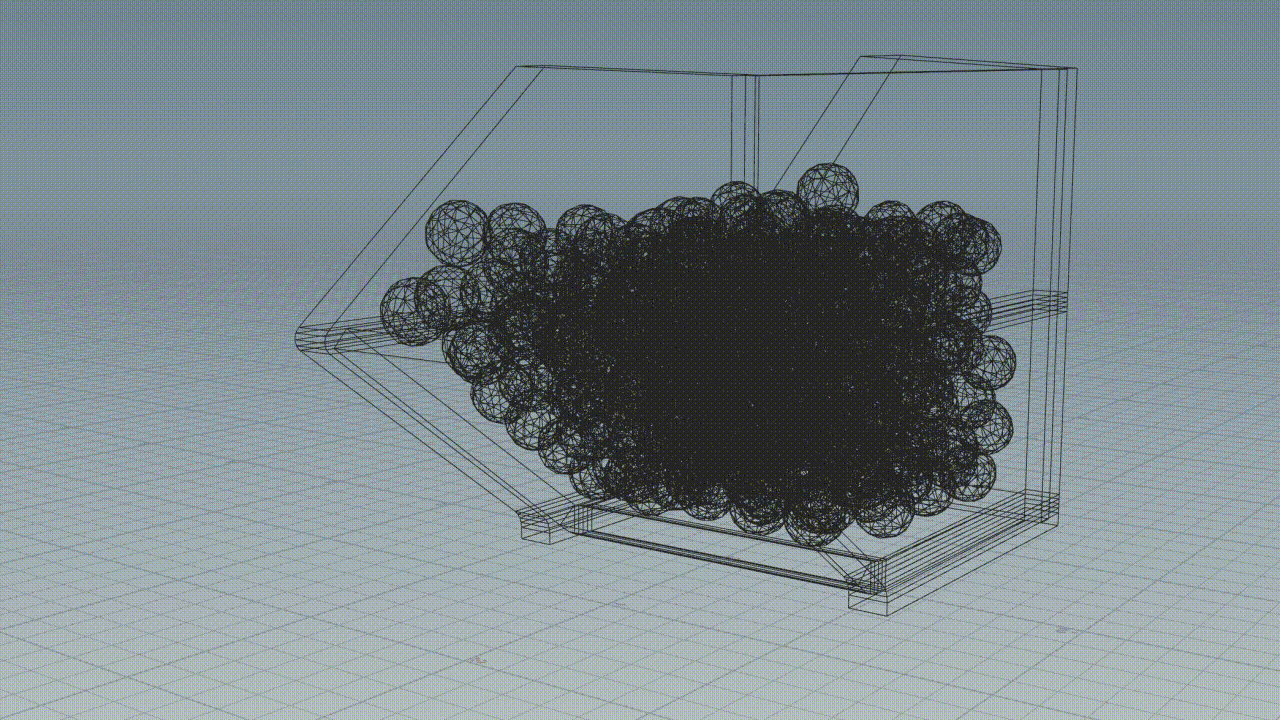
I began by creating a box and scattering points to it. Adding point jitter created a more scattered and "random" array of points. The points are then used as the points that the candy geometry will be copied to. Proxy geometry of candy is being used just to get an understanding of the workflow I want to use when it comes time to use the final geometry. This resulted in a mass of candies that could be converted into RBD's and dropped into a container. The goal of this was to get an initial starting "rest" position that the candies could be shown from.


The final resting positions of the candies could be cached and saved. It was important that I cached only the point data at the frame I wanted. This makes it so higher poly geometry can be applied to the points generated by a low poly simulation, resulting in a faster workflow. It also makes sure that when the simulations are handed to another team member, they get the same results that I get. I also noted that this process can be repeated over and over quickly generated different starting configurations for the candies. This will be helpful in the future for the different containers on the wall. I created a separate node that would house my import for the actual "bursting" simulation. I started by reading in the points from the resting simulation file and applied the candy geometry to them. That geometry could then be converted to RBD's for the burst simulation.


A fan force is being used for the burst. The idea is to push the candies upward rather than popping like an explosion would. A small cone angle is being used because I want to push them up from the middle like a fountain would. Force Per Unit Area, Falloff, and Max Distance are going to be the key factors to the simulation. Finding "sweet spots" for all of these parameters are going to be the difference in the look of my simulations. I also changed the activation from 1, which is constant "blowing" by the fan, to an expression that looks at the current frame I am on. If the current frame is less than 20, the fan is on, otherwise, it's off. This expression is helpful because it allows me to have full control over the fan force, making timing in the animation much better.

Week 1 Continued:
Day 3 was spent working on the beginning "rumble" type of effect. I began by applying noise MotionFX to the x translation of the candy bin. This caused a little shake to the bin and make the candies inside rumble. The problem with this was the candy bin shouldn't move. So the candy needs to move without having the bin be affected.

I instead created a shelf inside of the box that would move up and down creating the rumble within the box, without having to have the whole box move. I added a second box inside of the candy box, applied the same noise to the Y translation this time, so it would jiggle up and down. This works, however might still not be the best way to go about the movement. Since the boxes might be clear plastic, it might cause issues further down the road.


Week 1 Continued:
Days 4 and 5 were spent working on setting up Shot 7. The idea is sort of the same as the bin setup. I created a box, scattered points to it and placed it above my ground plane. I knew that I was going to need a system that could attach our candy pieces randomly to the scattered points. So I created an attribute called "rand" and randomly assigned values between 0 and 5 to each point. Then, in a switch node, I had the switch node look at each point's random value it was assigned, and switch to that piece. For example, if the 50th point had a "rand" value of 3, then the third input would be assigned. This results in a random assortment of candy in the air.


I then followed the same structure as the first sim. I converted the scattered candy pieces to RBD's and converted the ground to a static collision object and ran the sim. One of the first problems I ran into was the size of the candies. Houdini's default settings are intended for objects that are a few meters in size, not for pieces of candy a few centimeters wide. The collisions were not accurate and the geo's were reacting in weird ways. The collision padding was made much smaller, and the candies started behaving as they should. Another issue that arose was the pieces not coming to rest. It is another common issue with small scale scenes that the calculations get a bit weird and small pieces will roll on the ground infinitely. Using a technique from Professor Deborah Fowler (can be found here https://www.deborahrfowler.com/HoudiniResources/MiscSources/RBDMultisolversAndWrangles.html) I used a wrangle to manually slow the pieces down to stop that roll effect.


Week 1 Continued:
Day 6 was correcting an issue that arose after exporting the shot 7 animation. I realized that exporting the simulation as one file would bring in the candies as one object, basically making it unusable for whoever is applying our textures. I needed a way to have it so the workflow would be easier for our texture artists and renderers. I had already split up the points by giving them a random value. I could use that value to put points into different groups. I know that the points with the same random value would be assigned the same candy, so I split each candy into groups. From there I began the repetitive process of simming each group individually. The setup was the same as before, just with each candy individually.


I actually ended up liking this method better. I felt with the candies broken up I had more control over the simulation. Each candy could now have separate bounce and friction settings. I also could adjust the collision padding on the candies individually. If some candies were bigger, the collision padding didn't have to be as small and it could save me a few minutes here and there on sim times. That was it for Day 6. Day 7 I plan to begin simming the candies in their resting positions in the bins so the team can start piecing the full scene together.
Week 2:
I began working on how I was going to handle making the wall of stationary candies. I began by using the strategy I created Day 2 to make a stationary bin of candies. I knew the wall was going to be 32 bins, and we had 6 candies, so each candy needed to be simmed in 5 different variations, with two candies having an extra. For different variations, I tweaked the number of scattered points and jitter amount slightly resulting in a different configurations. All of these configurations were cached and brought into a different scene where I could set up the wall. Because I had to repeat this process 32 times, I spent the rest of the day simming and caching.


Week 2 Continued:
I took Day 8 to set up the static wall. I started by copy stamping the bin into the configuration I needed, 8 wide, 4 high. I then created different geo nodes to hold each individual candy configuration and loaded in their appropriate cache. Each node was set up very similarly. I decided that when I cached the resting position of a candy, I would cache only the point data from it. This made my caches very light, and since I am working in a group, keeping data light and transferable was an important deal for me. So I had to load in the point data, then apply the data to the candy it matched to.


There was some extra data that was created during the simulation process and saved in the cache that I didn't need. It was causing problems when applying the data to the points, so I used a delete attribute node to delete all the unnecessary data and just leave me with the point position and the point orientation. There were some extra candies that also either ended up on top of the bin or fell out of the bin. I didn't need those candies so I used a delete node to create a bounding box around the bin. Any candies outside of the bounding box were delete. I also manually selected any other candies that were in weird positions or stuck inside or on top of the bin and deleted them.


A problem I knew I would run into would be the poly count of the wall. The full poly versions of each candy, simulated 5 - 6 times each, copied to a few hundred points each, resulted in close to 14 million polygons. That would simply not suffice for the project. This wall of candies needed to be handed off to other group mates, so it needed to be lighter. I took each candy model and poly reduced them by to about 30 - 50% of their original size. I knew the candies would not be seen very close up, and the materials and textures would hide a bit of the faceting, so I figured that this would be a good way to reduce poly count. I also took another bounding box and delete a bunch of points at the core of each bin. My thinking behind this was that I could delete candy in the center of a pile, and the candies around the perimeter of the pile would hide the hole. With these two tactics I reduced the wall of candies from 14 milion to about 3.5 million polygons. Another good thing about the poly reduce node is that it preserves your UV's, so textures still work on the low poly versions as they would on the normal model.


I finished the day by planning out where each resting candy bin would go, and created a node that would house the entire wall. I merged in all 32 candies and transformed them to the correct position on the bin wall. I also put each candy type into a group so that it would be easier to assign materials that way (I later found that this was unnecessary).


Week 2 Continued:
I began work on the rumbling effect that happens before the fountains. I started by taking the candy resting bins that needed the rumbling effect and converting them to RBD's. There were a few strategies I looked into during RND. The one I decided to use was using fans underneath the bins to blow bursts of air quickly upwards, creating a vibrating effect. I used an if statement to turn the fan off if the frame number was divisible by 3, as well as if the current frame was less than 20.


The one issue I ran into was the force needed to create a cohesive effect across all of the candies. Each one that needed a rumble effect was slightly different in size and amount of pieces. So it was a lot of trial and error to match the same effect to each candy bin. It took two days of working with the forces, falloff, and distance for each to get similar effects. Another issue that has come up a few times throughout the project has been dealing with collisions on such small objects. I did not feel like fighting with it anymore, so I decided to just scale up the entire scene by 10. I figured if the effect is happening fast, I could finesse the gravity forces and time scale of the simulation enough that the effect still seemed based in reality. The pro's of working with larger geometry outweighed the con's. I was getting faster sim times, less interpenetration of geometry, and more realistic results overall. I simply just had to make sure the simulation was transformed back down to normal size before it was cached out.


After I simmed the rumbles for each of the 6 candy bins that needed them. I needed a way to time the rumbles to the music. I worked in premiere to get a decent idea of when during the shot the rumbles would have to start to play. In the candy setups, I then used a switch node, so when the rumble needed to play, the stationary candies switch to the animated rumbles. I am happy with this setup because if the timing is off I simply have to change the frame that the switch happens, and nothing has to be resimmed. It is also important to note why the timewarp is used. Since I simmed all of the rumbles from frame 1 - 60, if a rumble needed to happen on frame 150, when the stationary candy switches to the animated version, the animation would have already happened. So instead, I took the original frame range of the animation and retimmed it to where ever I needed it.


Week 3:
The original plan for the project was to render with Arnold inside of Houdini. The upside to that was it would save a lot of time because we wouldn't have to send fbx or abc files back and forth. The downside was that we were all pretty inexperienced with Arnold inside of Houdini, as well as the inexperienced with the correct workflow of rendering with Arnold inside of Houdini on the render farm. After some render tests, we discovered issues with our versions of Houdini and Arnold not matching the versions on the render farm, creating errors in our renders. We decided to rework our pipeline so that the rendering would be done through Arnold in Maya. The lighting, shading, texturing process would now be much smoother and look much nicer. The problem now was getting all of the sims into Maya. I feared the file sizes would be painfully large.
I decided to break up the simulations into pieces, by bin, rather than the entire wall. I figured doing this could make retiming inside of Maya possible, rather than having to reexport from Houdini. I took the animated candy bins and merged them into a separate node. This way the final animated version was packaged inside of one node by itself. I then exported them as separate alembic files. We tested a few versions of these. They all came into Maya nicely, UV's intact, and positioned correctly in the wall. The process was overall very painless and the file sizes were at most a few hundred mb's. I was very pleasantly surprised at the results. This process in all took 3 or 4 to figure out which rendering engine we would use, and how we would go about the pipeline, and finishing the last few geysers needed.


Week 4:
In order to create some variation in the candies, our look development artist created a shader that would change the color of the shader based on the object's ID. There was two problems that arose from this. When you imported the abc files into Maya, it would come in as one mesh. That was an easy fix, as the mesh could be separated using Maya's tools, but all of the objects would then be assigned the same object ID, rendering the shader useless. I needed a way to give the individual candies unique ID's that Maya could then use for the shader.
Huge shout out to Luke Vuilliomenet for this fix. We used an attribute wrangle to create a "name" attribute for the pile of candies, and then assigned each individual point a separate name based on their point number. After the alembic was then separated in Maya, they each had their own object ID number and the shaders worked.


Week 5:
Disaster struck our pipeline yet again when we learned that the abc files would work flawlessly when rendered locally, but would return errors on our renderfarm. The catch was however, some abc's would work, some wouldn't. Looking back at my setups, I was absolutely stumped due to all of the simulations being exported the same way. All 32 bins went through the same process. Reading the logs from the renderfarm, the error happened when Maya was trying to retrieve some attribute from the abc. I was fully prepared to have to completely scrap my workflow in Houdini when I stumbled upon an import option in Maya. I changed the referencing option to "Load no references." My thought behind this was that I felt the renderfarm was trying to grab some sort of data or information from the files that either was not there, or was not written correctly, resulting in the failure. Thankfully, this solution worked, and I was able to use the files on the farm.

Another issue that occurred was a jump in variations in the shaders. Some shaders had no variation, but when their animation played, they suddenly had variation. I think the issue lies in my setup for the candy. For static shots, I am using cached point data with geometry applied to the points. This workflow was created when Mantra was our render engine, because the point data was light and easily transferable to artists that needed it. When we switched to Arnold, I was unsure of how Maya would interpret this data, and how objects could be instanced to those points and if it could even be done, so I switched to caching the simulations with the geometry in it, so it could be directly brought into Maya. So when the static shots switch to the animated versions, their object ID's are changing, resulting in a new variation of colors. Thankfully, my Frankenstein workflow actually paid off, and I was able to bypass the switch node entirely, and simply prehold and posthold the animations via the timewarp nodes.

Week 6:
I received very helpful critique this week. The rumbles and geysers felt too similar in style and movement. The candies have different weights, densities, and are made of materials, so they wouldn't all interact the same way. For example, glossy, light mints would not interact with each other the same way that sticky gummy Swedish Fish would. Also, a pulsing fan directly underneath the bin blowing bursts of air at a constant rate was also resulting in boring rumbles. I decided to change the design of the network.
I took the main fan and changed the translations to a random function fit between a range. The rand() function generates a random number between 0 - 1 based on the user defined seed. I gave it the current frame ($F) so the location would change every frame. I used the fit() function to take that random number between 0 and 1 and change it to better fit the area I needed. For example, the bin I was using for the sim was 4 meters wide, and I wanted the fan to be able to cover that whole distance. So I took the random decimal between 0 and 1 and fit it into the range -1.8 and 1.8 to cover both sides. I also changed the amount of force to a random number fit between two user defined parameters. This made my tool more flexible, as I could now change the minimum and maximum force used to make the candy rumble. If I had a more dense and heavier candy, I could quickly change the amount of force I was using to rumble the candy.

We also felt that the building of the music, and the jump cut to shot 7 required more of a moment from shot 6. We worked out that the final note before the final shot of all the candy hitting the floor would be a few of the candy bins jumping out from their bins. This made the cut into shot 7 make a lot more sense. Since I already had the network for the geysers built, I simply had to turn up the force on the fan to produce a lot bigger pop from the candies.
Here is the result from those changes. I tested all of my alembics in Maya and the render farm first before handing them off to ensure no more surprises down the road. You can also see the updated previz here. The team changed some of the shots in shot 7 to make the overall sequence more dynamic and to build more energy.
bottom of page